Tuesday, June 29, 2010

Knuckles Sighting...Sarah at The Lunch Studio!

A few fun facts you need to know:

1) Flint Handmade has an AWESOME Knuckles logo designed by Yasmin Ladha.

2) We love when people in the community wear the Knuckles.

3) If we see you rockin' the Knuckles (on one of our shirts, bags, hats, etc.), we are gonna take your picture and post it on our blog as a Knuckles Sighting!

Our very first Knuckles Sighting was The Lunch Studio's own Sarah Mascara! 


Sarah sells her handmade goods under the name yarnscratch.  Her crocheted dolls are amazing and you should buy one...right now.  ;)  We love you, Sarah!

To purchase Knuckles swag, please visit our store display at The Lunch Studio or the Flint Handmade Etsy.

Thursday, June 24, 2010

PiP = Project in Process: Glass Mosaic Tray

Posted by Crystal

A few weeks ago, I told you all about my newest creative endeavor: a glass mosaics class at the Flint Institute of Arts.

Well, feast your eyes upon my Project in Process...which I am now calling PiPs!  As you can see, I decided to incorporate the red glass.  :)

using craft goop to adhere the glass tiles to the tray

close up of the glass tiles

my two-fifths done tray

I'm using reclaimed materials, so I don't have enough matching glass to cut tiles for the rest of the tray.  I'm trying to think of other ways to finish the project.  Here are the three options we came up with in class:

#1 - Tile the left side of the tray in an entirely different pattern and/or color scheme and create some kind of dividing design down the middle.

#2 - Use up the rest of my already cut tiles to finish exactly half the tray and then tile the left side in a different style.

#3 - Use up the rest of my already cut tiles to create a border around the sides of the tray and then tile inside the border in a different style.

I think #3 is my favorite idea, so I made a mock up to see what it would look like:

option #3 mock up with triangle tiles

So, what do you think, blog readers?  Which option should I pick for my PiP? 

And, if you have any PiPs of your own, email some photos to us at flinthandmade@hotmail.com!  We would love to blog about your PiPs, too!

Tuesday, June 22, 2010

Flint Handmade Vendors at Flint Art Fair!

Posted by Crystal

I was so excited to see TWO Flint Handmade vendors at the Flint Art Fair this year!

Jade of Stick Nymph and her adorable printed cards.

Steph of Frankenstitch Productions and her awesome monsta plush dolls.

Also, this lady totally blew my mind!

She was making tiny life-like flowers and insects out of colored clay.  Her attention to detail was amazing and each one only took her a few minutes.  She didn't have any business cards, but if you know her name or email, please let us know!

Gwen got a red and purple tiny clay butterfly...

...and then April had to go back and get a pink and purple butterfly!

Thursday, June 17, 2010

CRAFTY INK: We love a man with a sewing machine tattoo!

Meet Scott.  Scott is the Director of Finance for the Greater Flint Creative Alliance.


He is also one of the most badass guys to ever walk the face of the earth.

Why?

Because he has a TATTOO of a SEWING MACHINE on his ARM with his GRANDMA'S NAME!


Also, he has a wicked cool mustache.

How freakin' awesome is that?!?!

If you have any crafty ink to show off, email us photos at flinthandmade@hotmail.com!

Tuesday, June 15, 2010

June craftLAB Recap: No Sew Duct Tape Bags!

At our June craftLAB, Amy (FH Director of Sales and Merchandising) taught us all how to make no sew bags with fabric, duct tape and staples.  You may recall that Amy previously inspired Becky to make a similar bag.

Well, Flint Handmade decided to give everyone the opportunity to make these awesome bags! 

Lorraine and her daughter Sophia taping their bags.

Nicole shows off the very straight edges of her bag after she trimmed off the excess tape.

April creates one of the handles on her bag.

Jenny is the first one to finish her bag!  Amy strikes a crafty superhero pose!

April's finished bag!

Desere got fancy and added a ribbon closure tie to her bag.  Clever girl!

Laura and her daughter Jamie have cute bags and cute smiles!

Nicole is beaming with her rainbow bag!

"Oh, yeah, check out my bag!" says Jennette.

Tina is already using her bag...which would make a great lunch tote because of the water resistant duct tape lining!

Nayyirah looks so sweet carrying her new no sew bag...and wearing the adorable poncho she crocheted!

If you make a no sew duct tape bag, email photos to us at flinthandmade@hotmail.com.

NOTE: The first Sunday in July is Independence Day, so there will not be a craftLAB.  Join us on Sunday, August 1 for the Craft Supply Swap!

Saturday, June 12, 2010

'Cause there ain't no party like an Etsy b-day party!

The lovely ladies of Handmade Detroit are hosting one of many international birthday parties for Etsy

The party will take place at Toast Birmingham in Birmingham (Metro Detroit) on Friday, June 18. 

Click here for more info!

Thursday, June 10, 2010

TRY A NEW CRAFT: Glass Mosaics at FIA Art School!

Posted by Crystal

For the next 8 weeks, I am taking a class at the FIA Art School on Glass Mosaics.  Our first class on June 8 was amazing!

I took various scraps of turquoise, green and white glass (shown around the edges in the picture above) and used the tools to cut small rectangular tiles (shown in the center of the picture above).

These are the tools we used: (l-r) glass cutter, running pliers, nippers, and pliers.  The glass cutter resembles and exacto knife and it used like a pencil to score the glass.  The running pliers are used to snap a piece of glass in half along a straight score line made by the glass cutter.  The nippers are used to nip irregular shaped pieces of glass from the edges of larger pieces of glass.  The pliers are used to break apart pieces of glass that have a non-linear score line or that aren't quite large enough to work with the running pliers.

I'm using the running pliers to snap a piece of glass in half that I already scored with the glass cutter that's sitting on the table. 

This is the grinder. If your glass doesn't break cleanly and there are some jagged edges, you can use the diamond bit grinder with water to sand down the sharp or uneven sides.
 
At the end of the 3 hour class, I had a ton of new knowledge from our instructor, Amy Black, as well as a small container of rectangular tiles and a bunch of pieces selected to cut next week.  At the last minute, I saw the red glass and thought about adding it to the turquoise, green and white for an extra pop of color.

So, what do you think, blog readers?  Should I use the red glass?  :)

Tuesday, June 8, 2010

CRAFT TUTORIAL: Handsewn Button Mini-Cards

Posted by Crystal

Amy needed small cards to include with her Made With Luv etsy sales.  Always a good idea to thank the customer!  She saw the thank you cards I made for Michelle and wanted some of her own in a smaller version.

So, using the leftover card pieces I had from cutting Michelle's cards to fit the envelopes, I whipped up some easy mini-cards!  And, now you can, too!

Handsewn Button Mini-Cards

Materials/Tools:

1) Small Blank Cards (or cardstock to make cards)
2) Stamp (with whatever lettering you want: thank you, happy birthday, etc.)
3) Ink Pad
4) Assorted Buttons
5) Assorted Thread
6) Packaging Materials (clear bag, glass bottle, ribbon, etc.)

 Step 1: Stamp your mini-cards toward the left side of the card.  Clear stamps work great for this since you can see exactly where you are stamping.

 Step 2: Choose which buttons you want to place on the cards.  Larger buttons look great by themselves and smaller buttons look good paired up.


 Step 3: Choose which thread you want to use to sew the buttons to the cards.  Feel free to choose a variety of different colors.


 Step 4: Sew the buttons to the cards.  If your buttons have 4 holes, an X stitch looks awesome.

Step 5: Package the cards in a glass jar or other cute packaging.  Since these cards are being included with etsy purchases, envelopes are not really necessary, but you could make your own small envelopes using a template.

If you make these cards (or envelopes), be sure to email pictures to us at flinthandmade@hotmail.com.

Thursday, June 3, 2010

CRAFT TUTORIAL: Photo Corner Cards

Posted by Crystal

Ok, here's how it all went down: 

Michelle (who you may know as the FH Director of Technology and the mastermind behind Aisle 3) needed thank you cards to give to friends and family who had recently helped her fix up her yard and garage. 

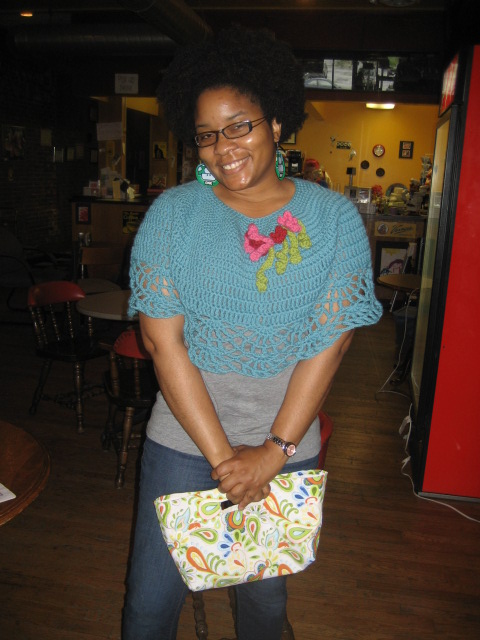
I needed motivation to work on a new craft project...as well as a summer bag/purse to carry all my junk.

So, we made a trade: Michelle gave me motivation and I gave her the cards I made with said motivation.  And, soon, she's gonna give me a sweet upcycled bag...of which I will take lots of pics to post here.  ;)

Since we got a great giving mood going on, we're gonna give YOU something now, too!  You get a Flint Handmade Craft Tutorial!!!  We hope to make and post lots of tutorials on our blog and website.

Today's tutorial is on Photo Corner Cards.  These are the actual cards I made for Michelle.  We hope you enjoy!

Photo Corner Cards

Materials/Tools:
1) Small Images (found in catalogs, magazines, junk mail, packaging, old greeting cards, etc.)
2) Cardstock (only needed if your images are printed on thin paper)
3) Gluestick (only needed if your images are printed on thin paper)
4) Paper Cutter (or scissors)
5) Photo Corners (available in the scrapbooking department of craft stores)
6) Stamp (with whatever lettering you want: thank you, happy birthday, etc.)
7) Ink Pad
8) Cards (or cardstock to make cards)
9) Envelopes
10) Packaging Materials (clear bag, ribbon, etc.)

Step 1: If your images are printed on thin paper, glue them to cardstock to make them a little thicker.  This will help them stay neat and flat in the photo corners.  If your images are already printed on cardstock, skip ahead to Step 2.

Step 2: Using a paper cutter (or scissors), cut your images out.  Cut just inside the line of the image for the cleanest look.

Step 3: Place the photo corners on the edges of your image and adhere the corners (with the image inside) to the card.

Step 4: Stamp your lettering underneath the image and include an envelope with each card.

Step 5: Package your cards.  You can place them in a clear bag or wrap them with ribbon or create your own cute packaging!

If this tutorial inspires you to make your own Photo Corner Cards, email us at flinthandmade@hotmail.com.  We would love to see and post photos of your cards on our blog!

Wednesday, June 2, 2010

ROAD TRIP: Wholly Craft! in Columbus, Ohio

Posted by Crystal

My friend, Gwen, and I took a weekend road trip to Columbus, Ohio in May.  You may be asking, "Why Columbus?"

Two words: Wholly Craft!

Wholly Craft is a handmade heaven!  The store sells handmade jewelry, bath products, clothes, paper goods, fashion accessories and more from over 100 artists and crafters.  It is bright, colorful, well-stocked and absolutely freakin' awesome. 

Super cute window displays!

Tons of crafty goodness.

So many delicious cupcake bath bombs.  Yum.

We loved seeing Reware Vintage from Detroit in Columbus!

Here is a brilliant idea for a shirt display: Hang as many shirts as you can fit on your rack with labelled letter tags for each style...

...that correspond to cubbies on a nearby shelving system to stock extra sizes and colors!

Doesn't this picture just make you smile?  :)

Wholly Craft also offers workshops and other events.  So, if you are ever in or near Columbus, Ohio or just want to take a weekend road trip, you should definitely make a point to stop at Wholly Craft!